Monday, April 30, 2012


Baby shower cake I was hired to make!

(The shower had a safari theme!)


Butter-cream base with fondant spots!

Mostly Done!

Another view! 


Finished cake!


Monday, April 23, 2012

I was "hired" to make a princess cake for my Hubbies cousin's little girl (say that 10 times fast!)


Up first a two layer round cake. Here it is crumb coated and waiting for fondant!


Fondant (made in advance) being mixed in a plastic baggie; which was sprayed with cooking spray to avoid sticking. I added my coloring and mixed till evenly colored. I then sprayed my counter with cooking spray and rolled the fondant large enough to cover the cake, smoothed, and trimmed off excess.

Here is the cake with a "quilted" top and a rounded lip!


Sheet cake in butter cream waiting to set so I can smooth it (done by waiting for a slight crust on frosting then use a paper towel and lightly rub over cake! If the paper towel is textured it WILL show up on the cake)

Smoothed cake with round cake in place!


All decorated (pre-jewels) I added some edible glitter to the top of the round cake for extra sparkle!


Cupcakes with a simple flower ribbon texture on  top! 


Sorry this last pix is a little blurry!


Cake with added jewels! Great job adding the Bling Brittany it really added a LOT to the overall design!!!


Beautiful     Birthday   Girl!!!!!!          


Wednesday, April 18, 2012

Baptism Cake

Our youngest son just got Baptized on the 14th of this month at 3 months old (being he was 7 1/2 weeks early and spent a great deal of time in the hospital)

Below you will find some some things that worked good and some well lets just say....not so much!

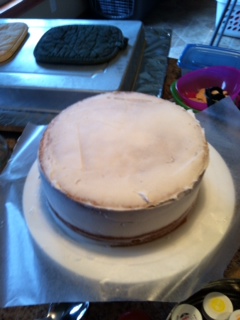
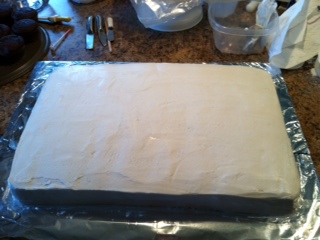
This is my first attempt at doing fondant on a sheet cake. Mistake #1 ~ I could not find my smoothing tool that was sitting on my counter right under my nose!.. I was not supper impressed as the fondant was a little dry and cracked in places. The lesson I learned here is more moisture content in the fondant on larger cakes for a smoother appearance!
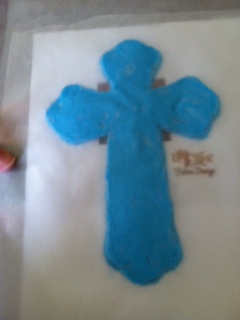
 Technique #2 ~ transfer butter-cream image onto cake (print image-in reverse if a character) place wax paper over and build from bottom up -putting outlines down first. Put image in freezer to set up and then transfer to cake. Mistake #2 ~not using a frosting that hardens- royal or a thick butter-cream would work great here in my opinion. I say this because my butter-cream cross never really set up- it stayed soft.
   

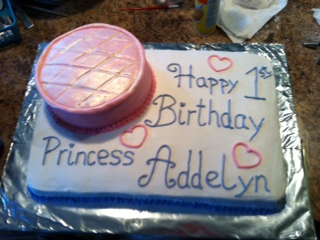
While waiting for the cross to set up I piped dots around the bottom using a tip #12.  I am still working on my consistency of dot size, but thought it turned out good!

I thought it would be pretty to add some blue roses (I used tip # 102). However, because of the soft nature of my butter-cream which I had pretty thin to do the dots and cross. My roses did not set up (again should have used a thick butter-cream or royal icing for them)- but they were cute so I'm posting a picture of them even though I didn't end up putting them on the cake  .

New technique #3 ~ Painting on a cake with diluted gel food coloring. (small amount of water on a brush dipped into lid of color worked great for me- doesn't take much water to get a paint consistency) Again, few errors made but liked how it easily wiped from the fondant with a damp paper towel. I also practiced on my "scrap" fondant to get the consistency I needed for painting.

I then stamped on the cross with my scroll tools (by Wilton) and painted black scrolls and an outline on the cross. I found it was more difficult as the butter-cream was soft and wanted to move with the strokes of the brush.  But with a soft hand and patience it turned out OK. 
 

Overall, I am content with this cake; it had a lot of firsts for me which is why I was "experimenting" on a cake for my family as opposed to one someone ordered. :)

Monday, April 9, 2012

Easter Treats!

For Easter I made chick cupcakes and also did rice-krispie treat eggs.

Frosted cupcake with colored sugar on it. (To get colored sugar- add food coloring and stir. If using a gel- thin with water first then mix into sugar - may have to let dry before using to break up clumps) Dip frosted cupcake into colored sugar!
  
Pipe wings with a number 102 tip 
Add chocolate chip "eyes" and dot with white frosting (using tip #2)
Pipe orange beak and feet with tip #4

Now for the rice-krispie eggs!! I make rice-crispies and formed into the shape of an egg after set some I reformed them to get the exact shape I was looking for (and to reattach the loose spots!) I then piped on the grass and flowers using sandwich baggies with the tip cut off (had extra frosting from a previous project that needed to be used up!) After they "set-up" I put them into muffin liners!
              

The entire batch boxed and ready to go!
                                                        

               ON DISPLAY!!!
 (thanks A.P. for my cupcake stand!)